Using the shortcode
Here’s a step-by-step guide on how to use the [payhip-lists] shortcode to create a products page on your WordPress website:
- Create a new page or post on your website where you would like to display the list of products.
- In the content editor for the page or post, add the shortcode [payhip-lists].
- Publish or update the page or post.
- The list of products from your Payhip store will now be displayed on the page or post where the shortcode was added.
Customization
In order to customize the appearance of the products page created using the [payhip-lists] shortcode, you can use the “Customize” option in the top bar of the WordPress dashboard. Here are the steps in more detail:
- Log in to the WordPress dashboard for your website.
- Click on the “Customize” option in the top bar.
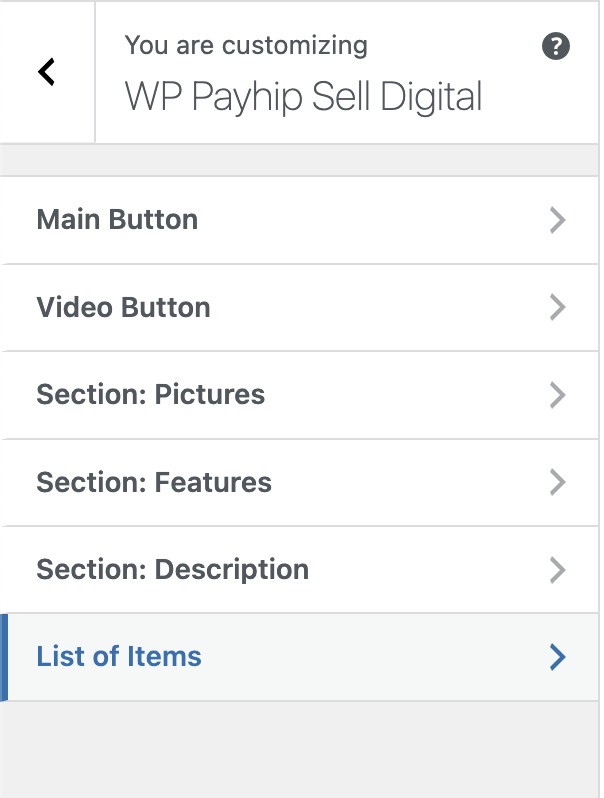
- In the left sidebar, navigate to the “WP Payhip Sell Digital” option and select it.
- Once the plugin’s customization options load, you should see a “List of items” option.
- Click on the “List of items” option.
- You will now have access to various customization options such as changing the color scheme, font, layout, and more.
- Make the necessary changes and click on “Save & Publish” to apply the changes to your products page.